

What are Web Stories?
Web Stories are a new and exciting way to show full-screen content on the web. The format combines videos, images, text, and other elements to deliver engaging and interactive experiences to website visitors.
The Story format was born in social media but it is not limited to these platforms anymore, as Web Stories can be embedded in any webpage.
Unlike traditional social media stories, Web Stories do not disappear after 24 hours. Instead, you can keep them active as long as you want. Since it is possible to add interactive and personalized elements to the Web Story content, you can use this powerful tool to decrease bounce rate, increase pageviews, and maximize session durations with audiences on the open web.
Why Should You Consider Embedding Web Stories in Your Website?
Embedding Web Stories in your website can be beneficial for several reasons:
Increasing customer engagement
Web Stories are designed to be highly visual and interactive, which can help capture your audience's attention and keep them engaged with your content.
Mobile-friendly
Web Stories are optimized for mobile devices, which is important given that mobile internet usage continues to rise. By embracing Web Stories, you can ensure that your content is easily accessible and enjoyable on the devices your audience is using.
Brand building
Web Stories offer an opportunity to showcase your brand in a creative and engaging way. By using visually stunning images, animations, and videos, you can build a strong brand identity and reinforce your messaging.
New audiences
Because Web Stories are a relatively new format, they can help you reach new audiences who are looking for fresh and exciting content.
Increased sharing
Web Stories are highly shareable, which means that your audience can help spread your message and content across social media platforms, expanding your reach and increasing your brand awareness.

How to Create Web Stories in 5 Steps
Now, let us guide you to create Web Stories with Storyly in 5 simple steps.
Watch the video below to learn how to do it right away or continue reading for all the details.
Step 1 - Adding your website to the Storyly dashboard
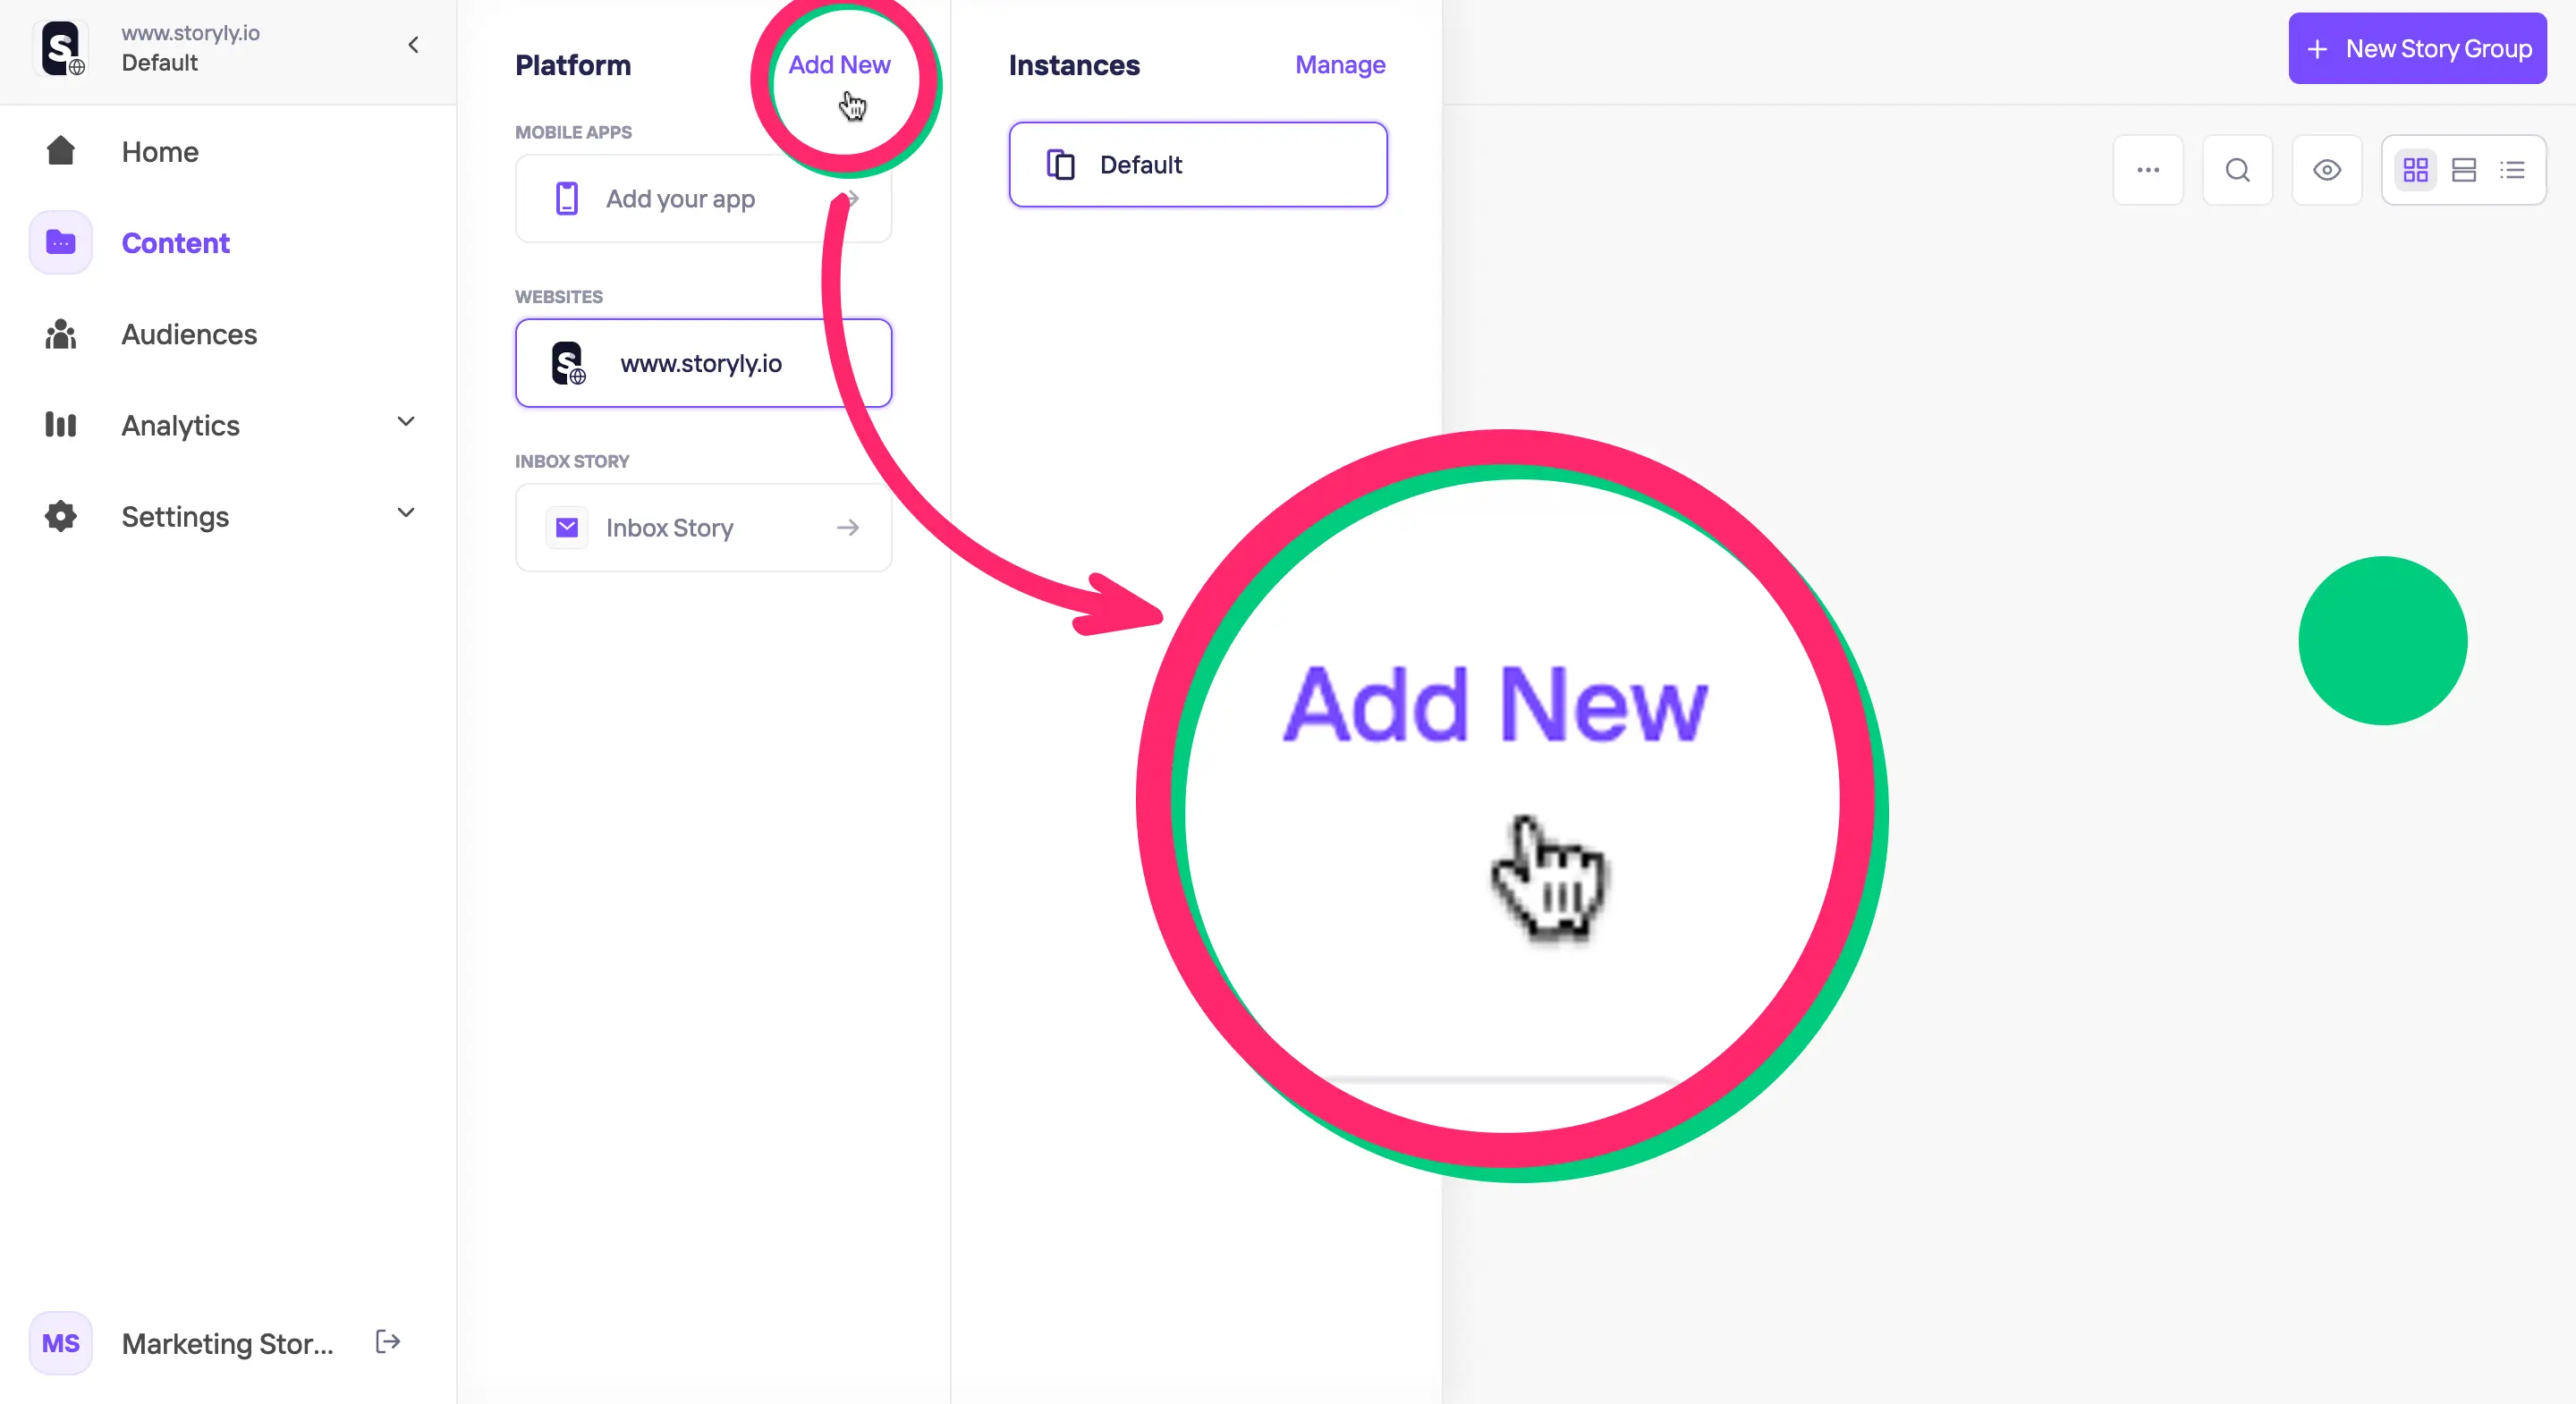
Register for an account on storyly.io as you can sign up for free and you will receive a confirmation link in your email address to complete the signup process. Once you sign up or if you already have an account, please login and you'll find yourself in the Storyly dashboard. From here you can hit the home section and click on add new to add your website to the dashboard.
Step 2 - Web integration
After adding your website to the dashboard, you can navigate to the Settings > Account Management > Apps and Websites section and you will find the token for your website and here is a quick guide for this.
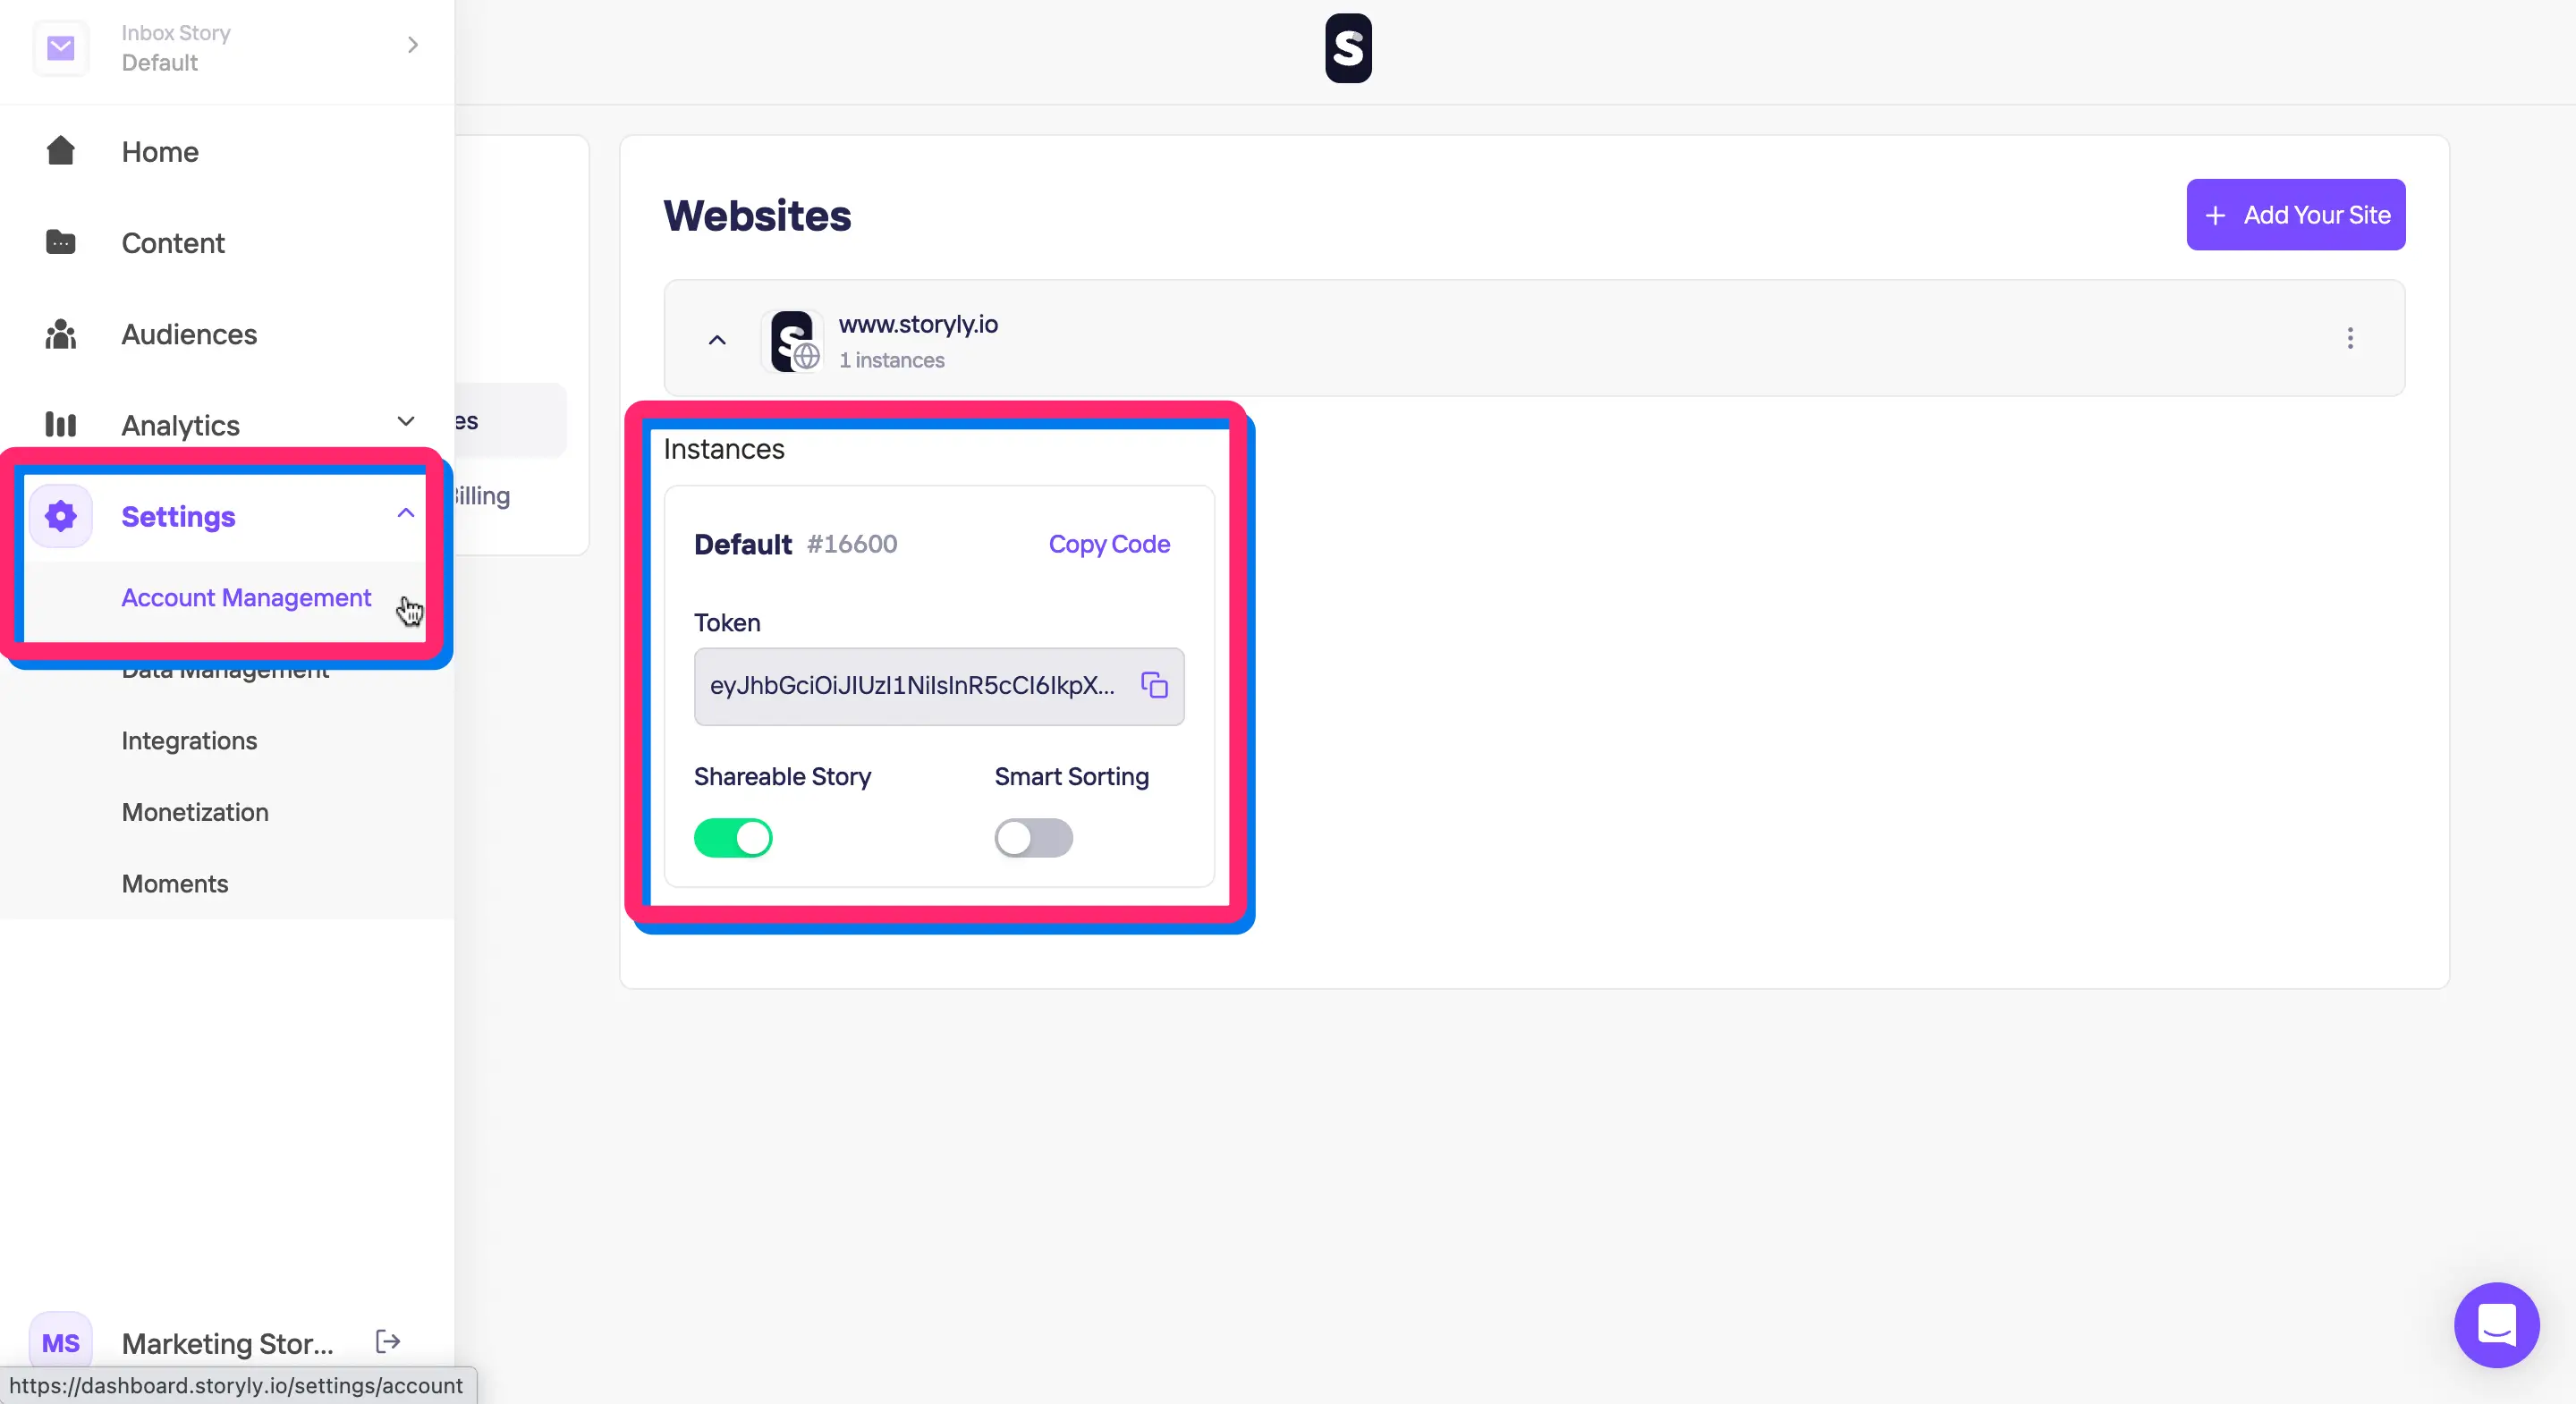
You can pass this token to your development team to integrate the Storyly SDK, which means your dev team will implement the Story bar wherever you have decided to place Stories in your website. Usually, we recommend you to place it at the top of your website homepage just underneath the main website banner.
Here is a quick guide for a basic Storyly web integration for your dev team and it normally takes less than a day to integrate Web Stories.
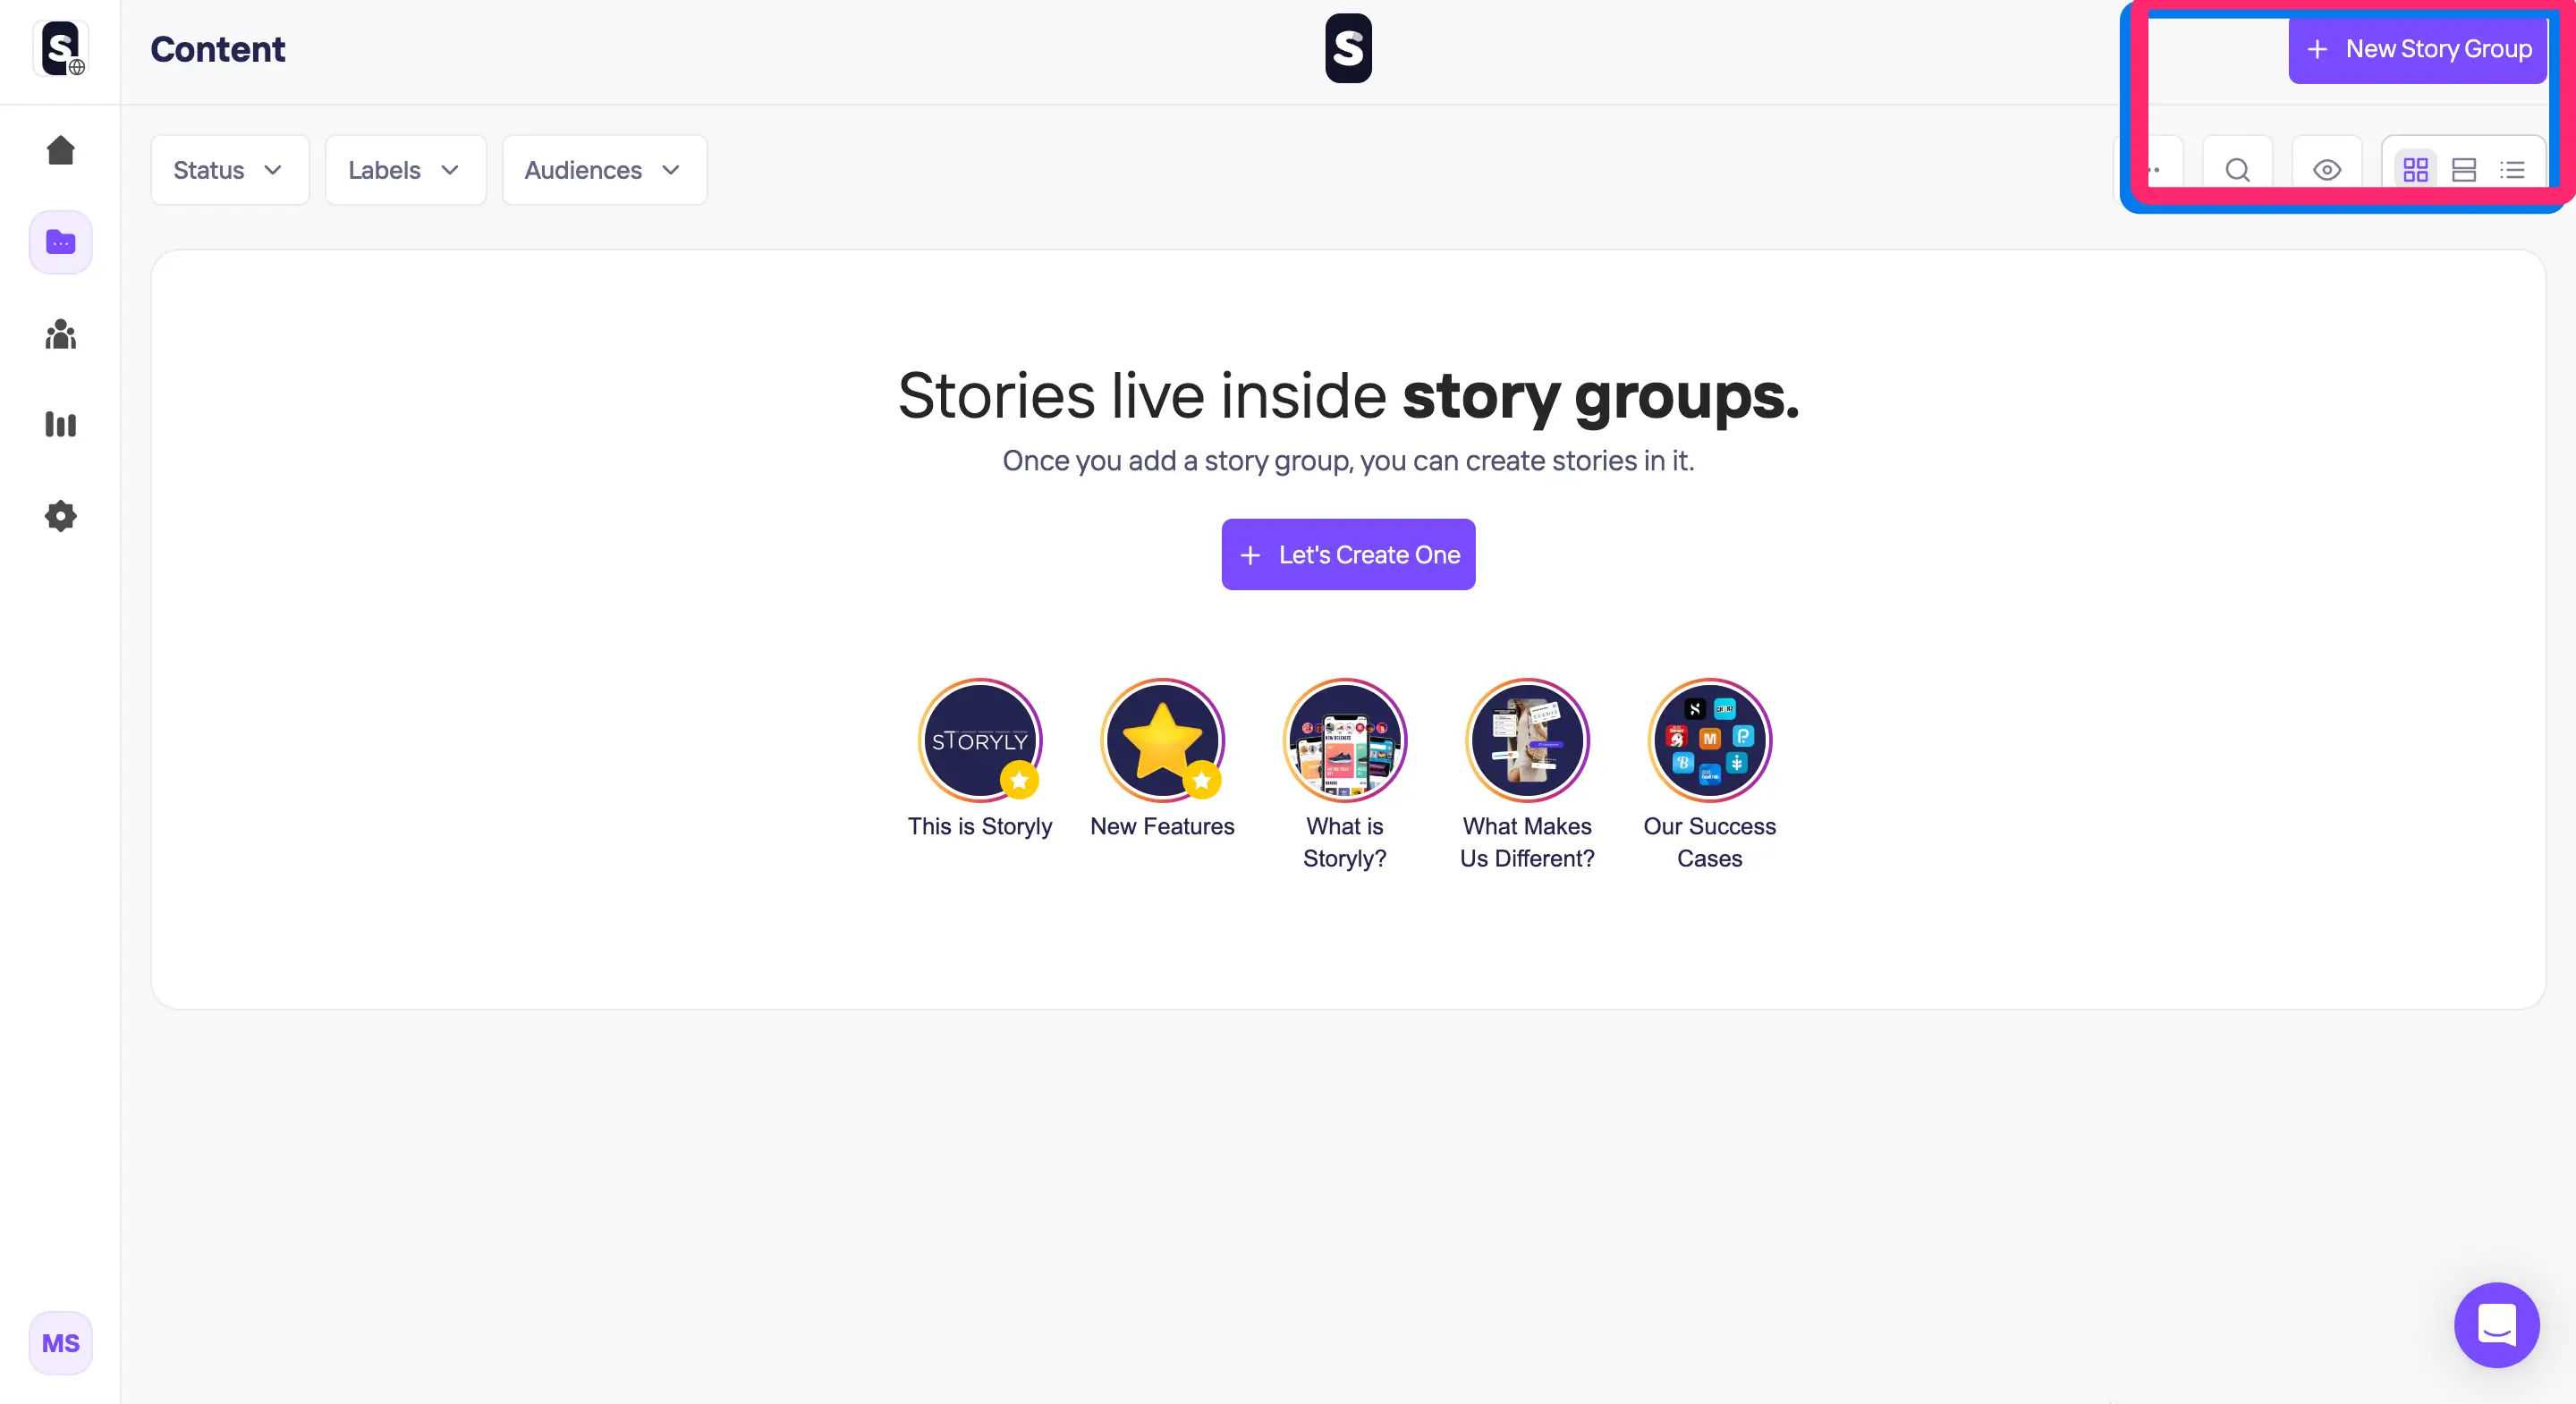
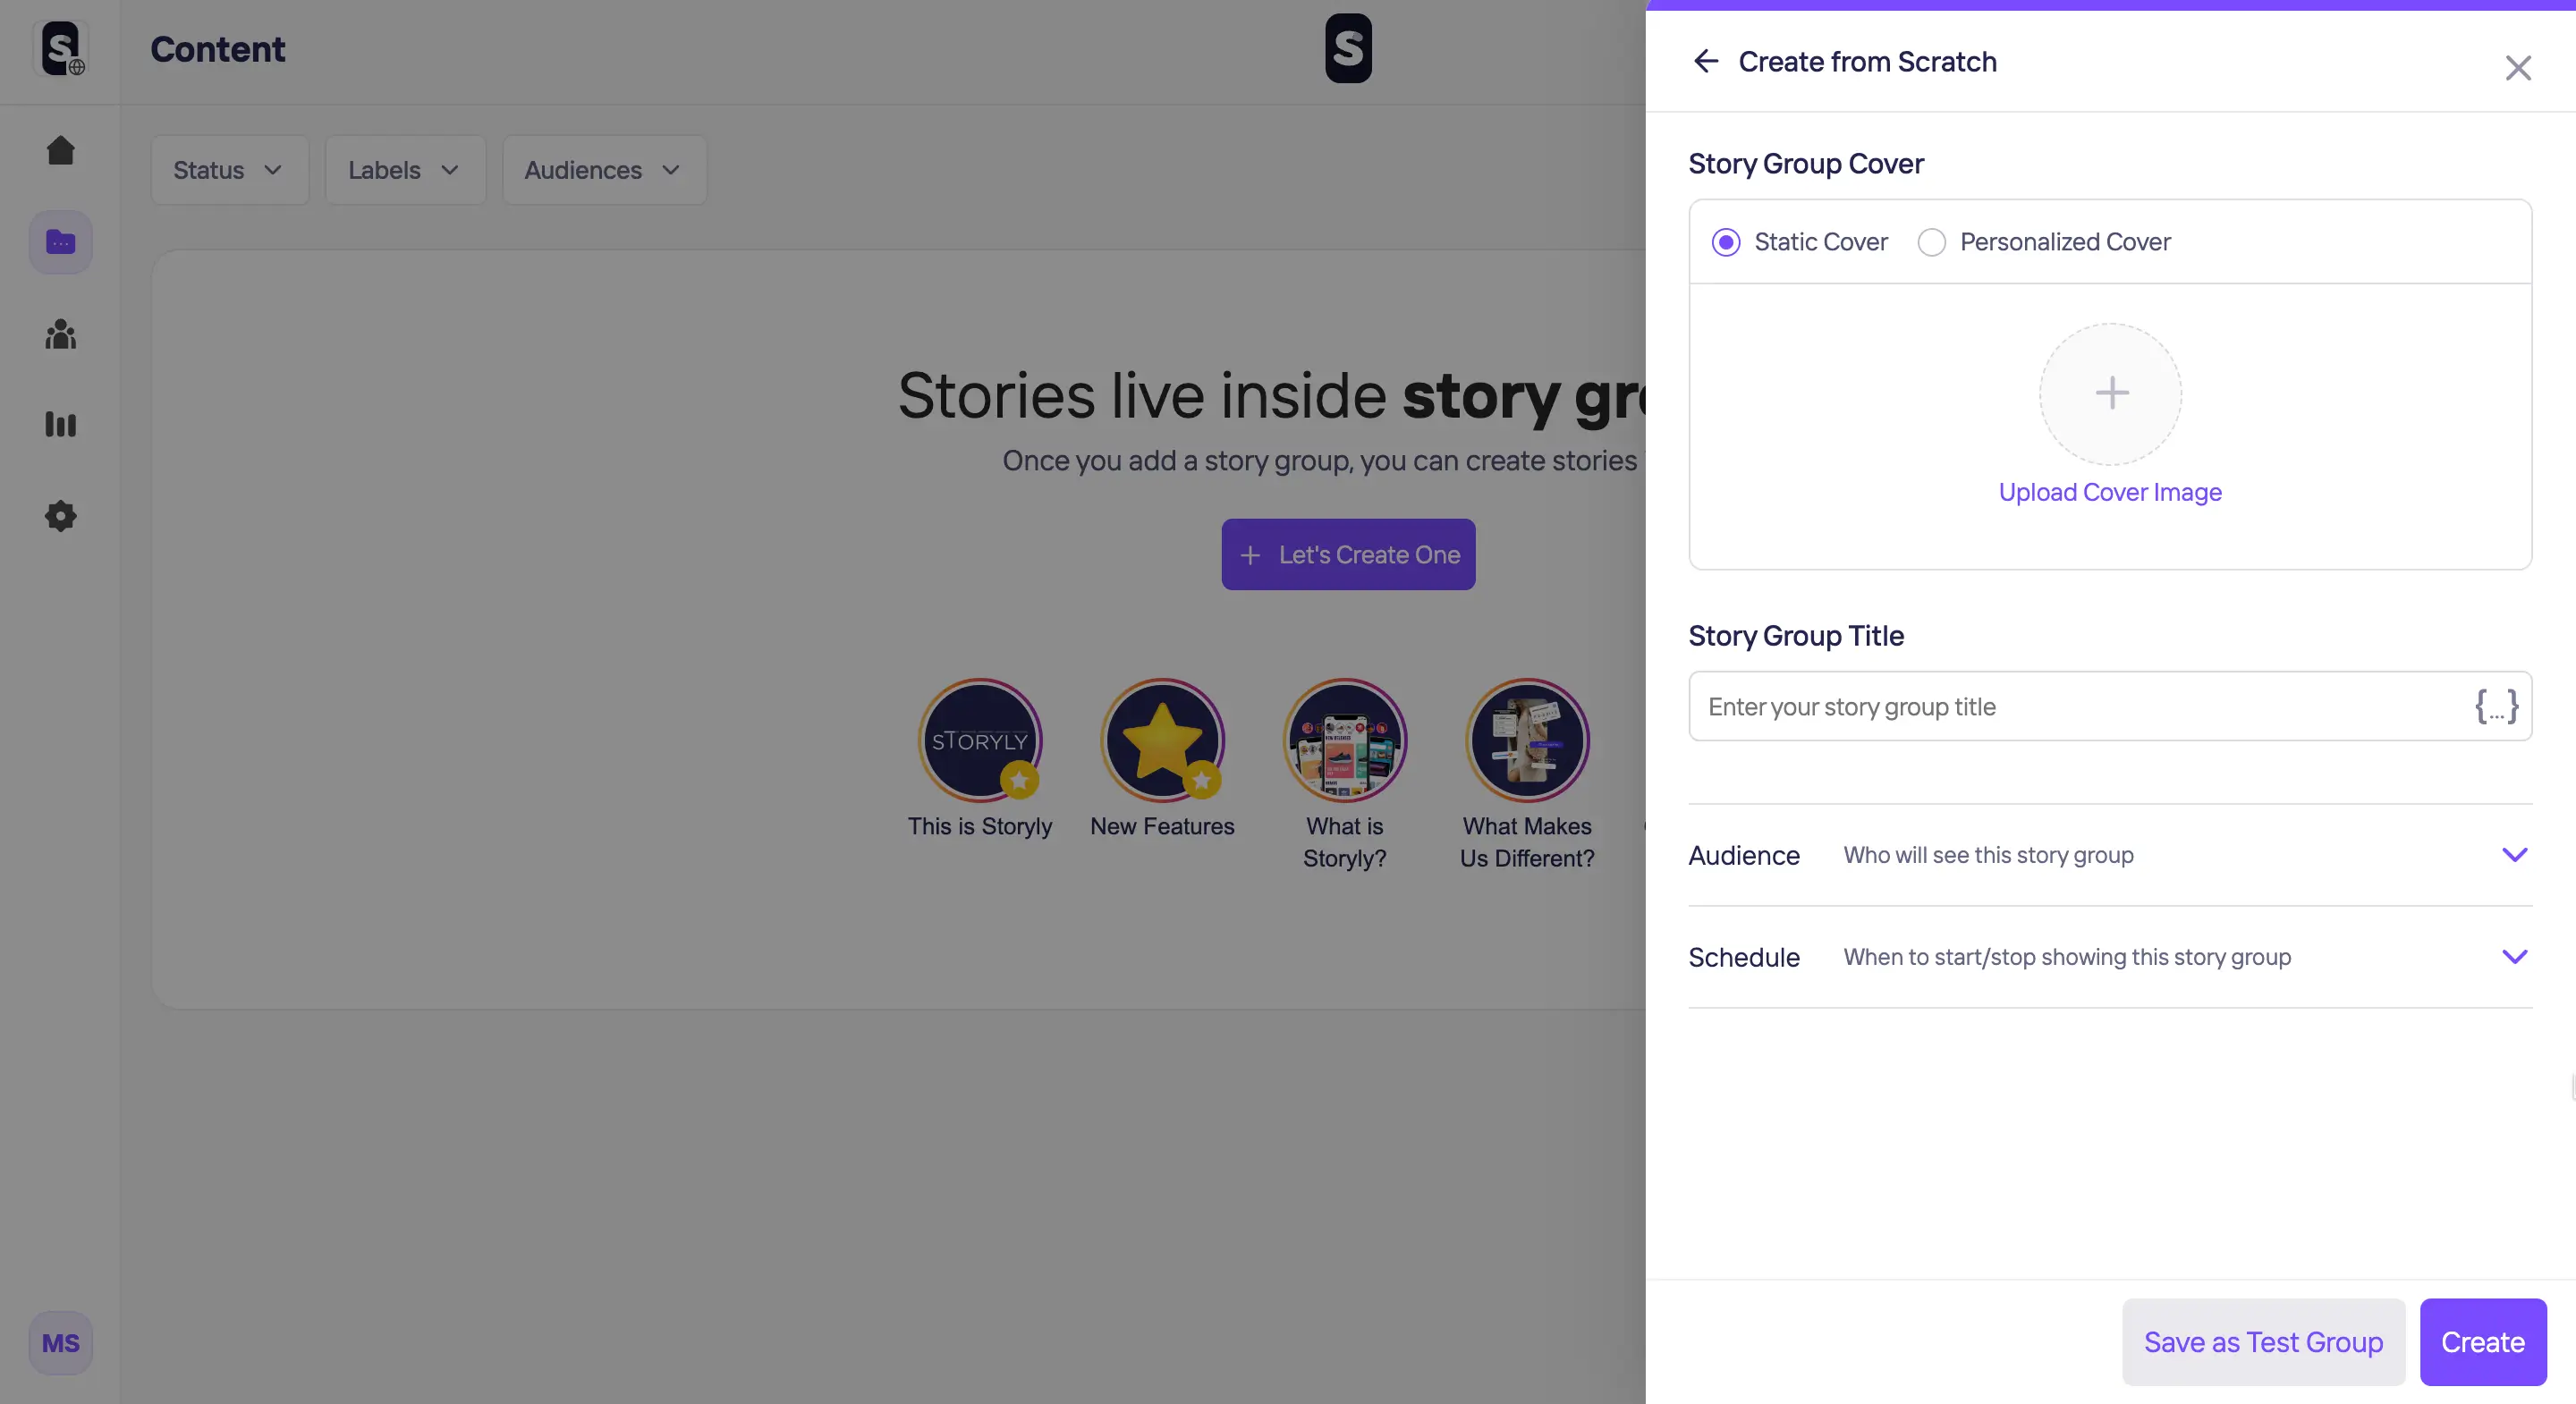
Step 3 - Creating your first Story group
Now that you have sorted out the integration, it's time for the fun part, creating a Story group. In the dashboard from the left Menu > Content section > Click on “New Story Group.”
Select the option “create from scratch” as this is the easiest way to quickly create a Story group and then fill in the Story group title, upload a group cover image.
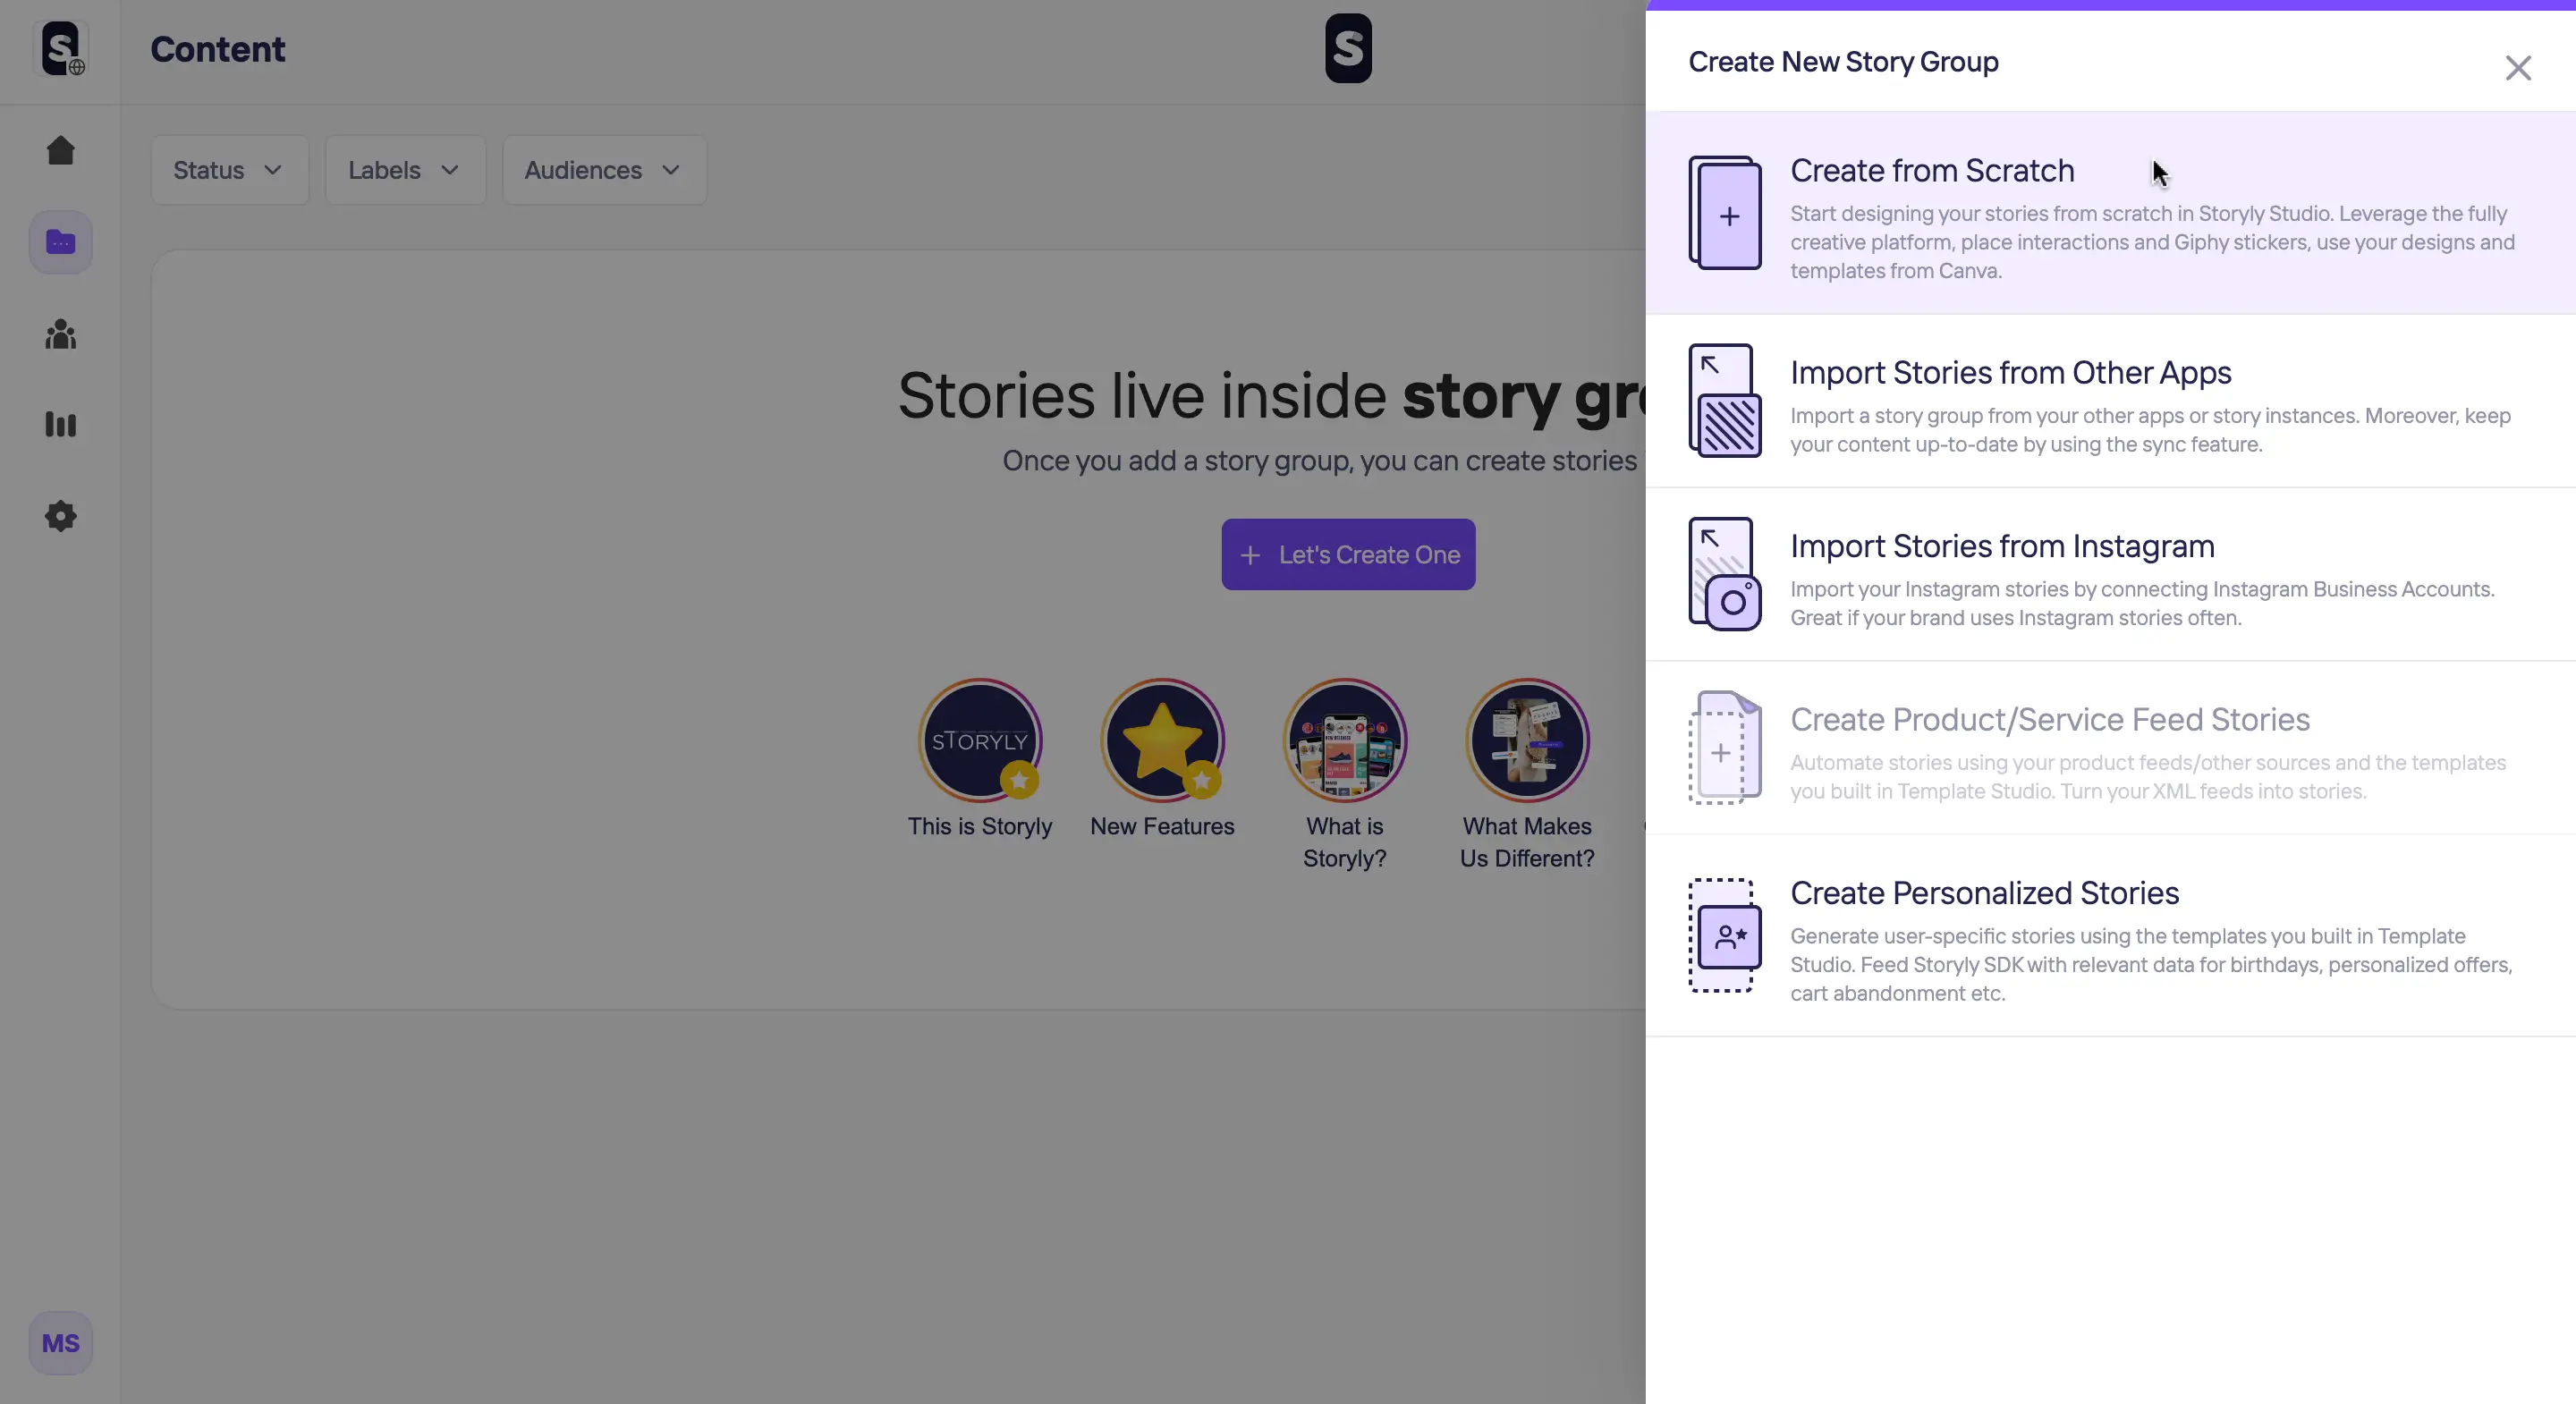
For now we will skip the other settings and hit the “Create” button on the bottom right corner. This will take you into the studio where you have a few options to create or upload already made content. However, before you click on the “Create” button, you also have another option to save the Story group as a test to ensure that it doesn't appear on your website if you are already integrated.
Of course after you have added all of your content and your Story group is ready, you can set it live as explained in step 5.
Step 4 - Creating Content
Creating and uploading the content that will make up the Stories and Story groups your users will see is very easy as the studio provides you with the below options to create content.
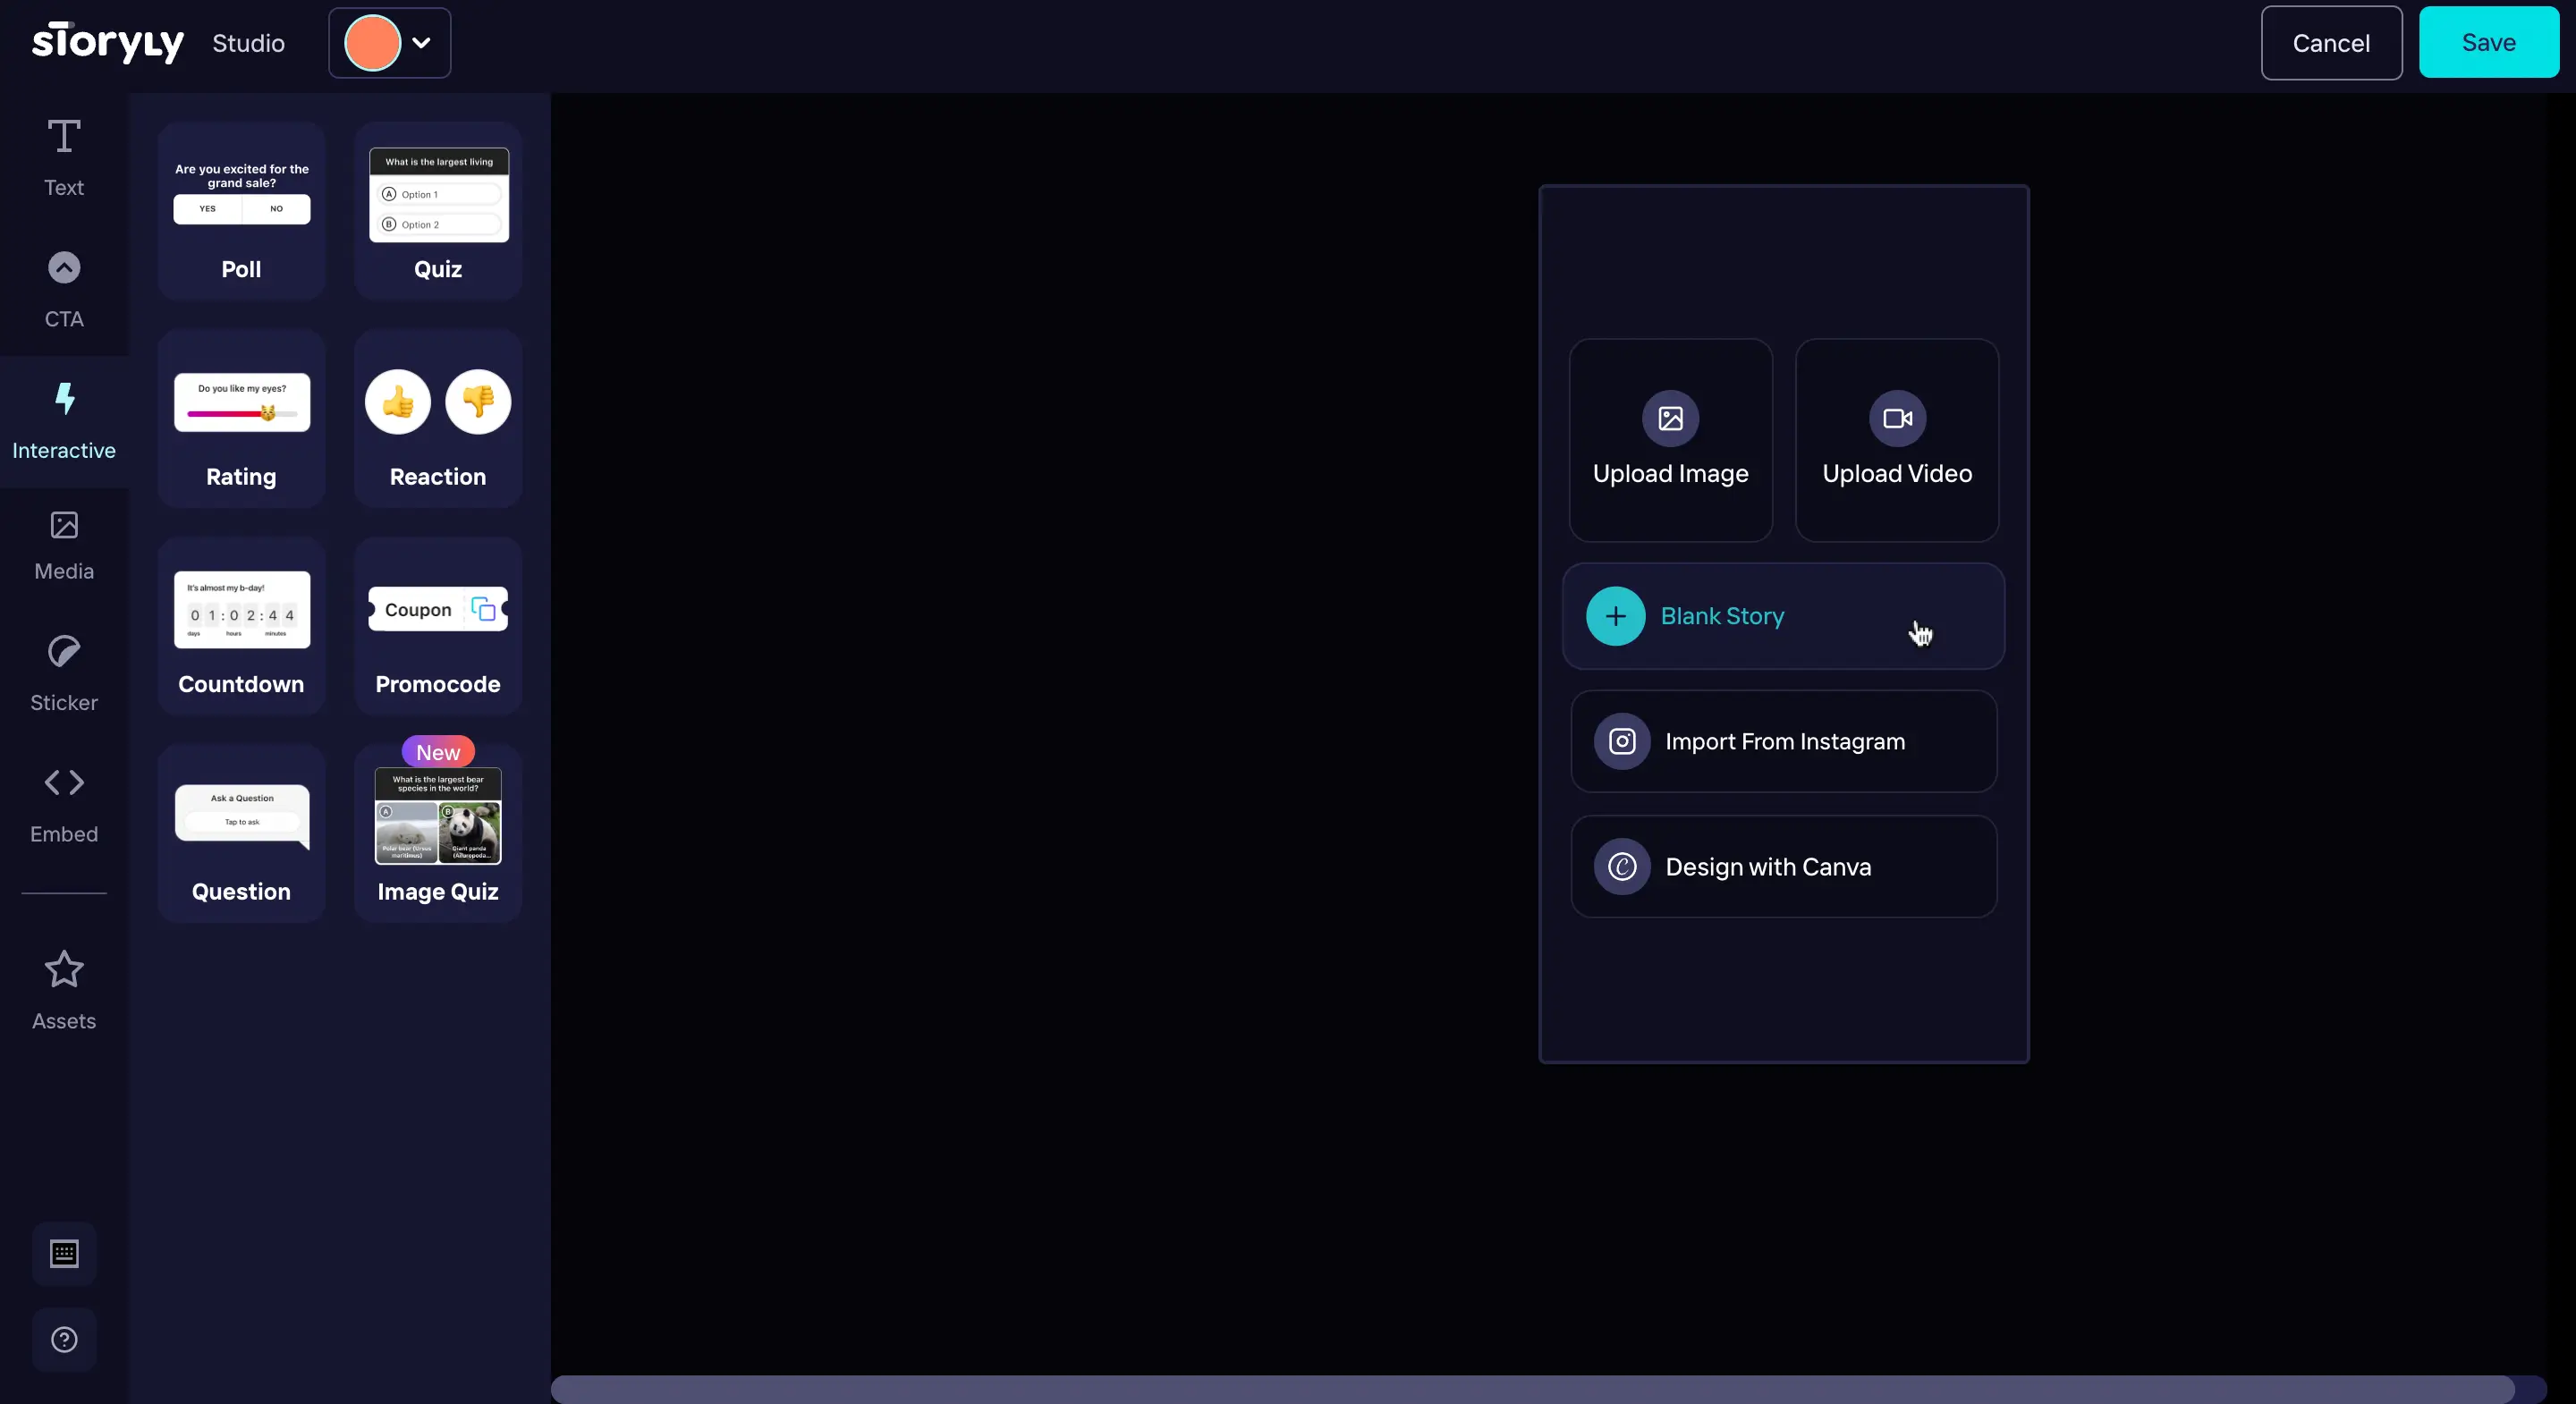
- Start with a blank Story canvas - With this option, you can let your imagination go and get creative by using the options on the left hand side such as the text tool, CTAs (buttons and swipe-ups), interactive elements such as polls and quizzes. You can add stickers and other elements to your Story by using the Giphy library or the media section to upload it from your device.
- Instagram import - You can import content from Instagram, that's right, Storyly makes it very easy for you to quickly import any Stories that you have live on your Instagram account into the studio where you can further add other elements from Storyly studio and then set it live as a Story on your website.
- Canva - Just in case you have a Canva account, Storyly studio has you covered as you can sign into your Canva account from the studio and then create your content in Canva and publish it into the studio for any further customisation before you set it live.
- Upload image and video Stories - Just in case you use your own external design platform and you already have content that's ready to upload, you can use the upload image option in the studio to upload your Story designs. Also if you have any videos you can certainly also upload them in the studio as video Stories, the studio allows you to upload up to 15 sec, 30 sec, and 2 min video Stories.
Step 5 - Testing and Going Live
Now that you have created your first Story group and content, you can now test this to see how your Story bar and Stories will look like in a live environment. Whilst in the content section, on the top right of the dashboard, you will see a few options including the preview option that allows you to preview on desktop web and also on mobile web.
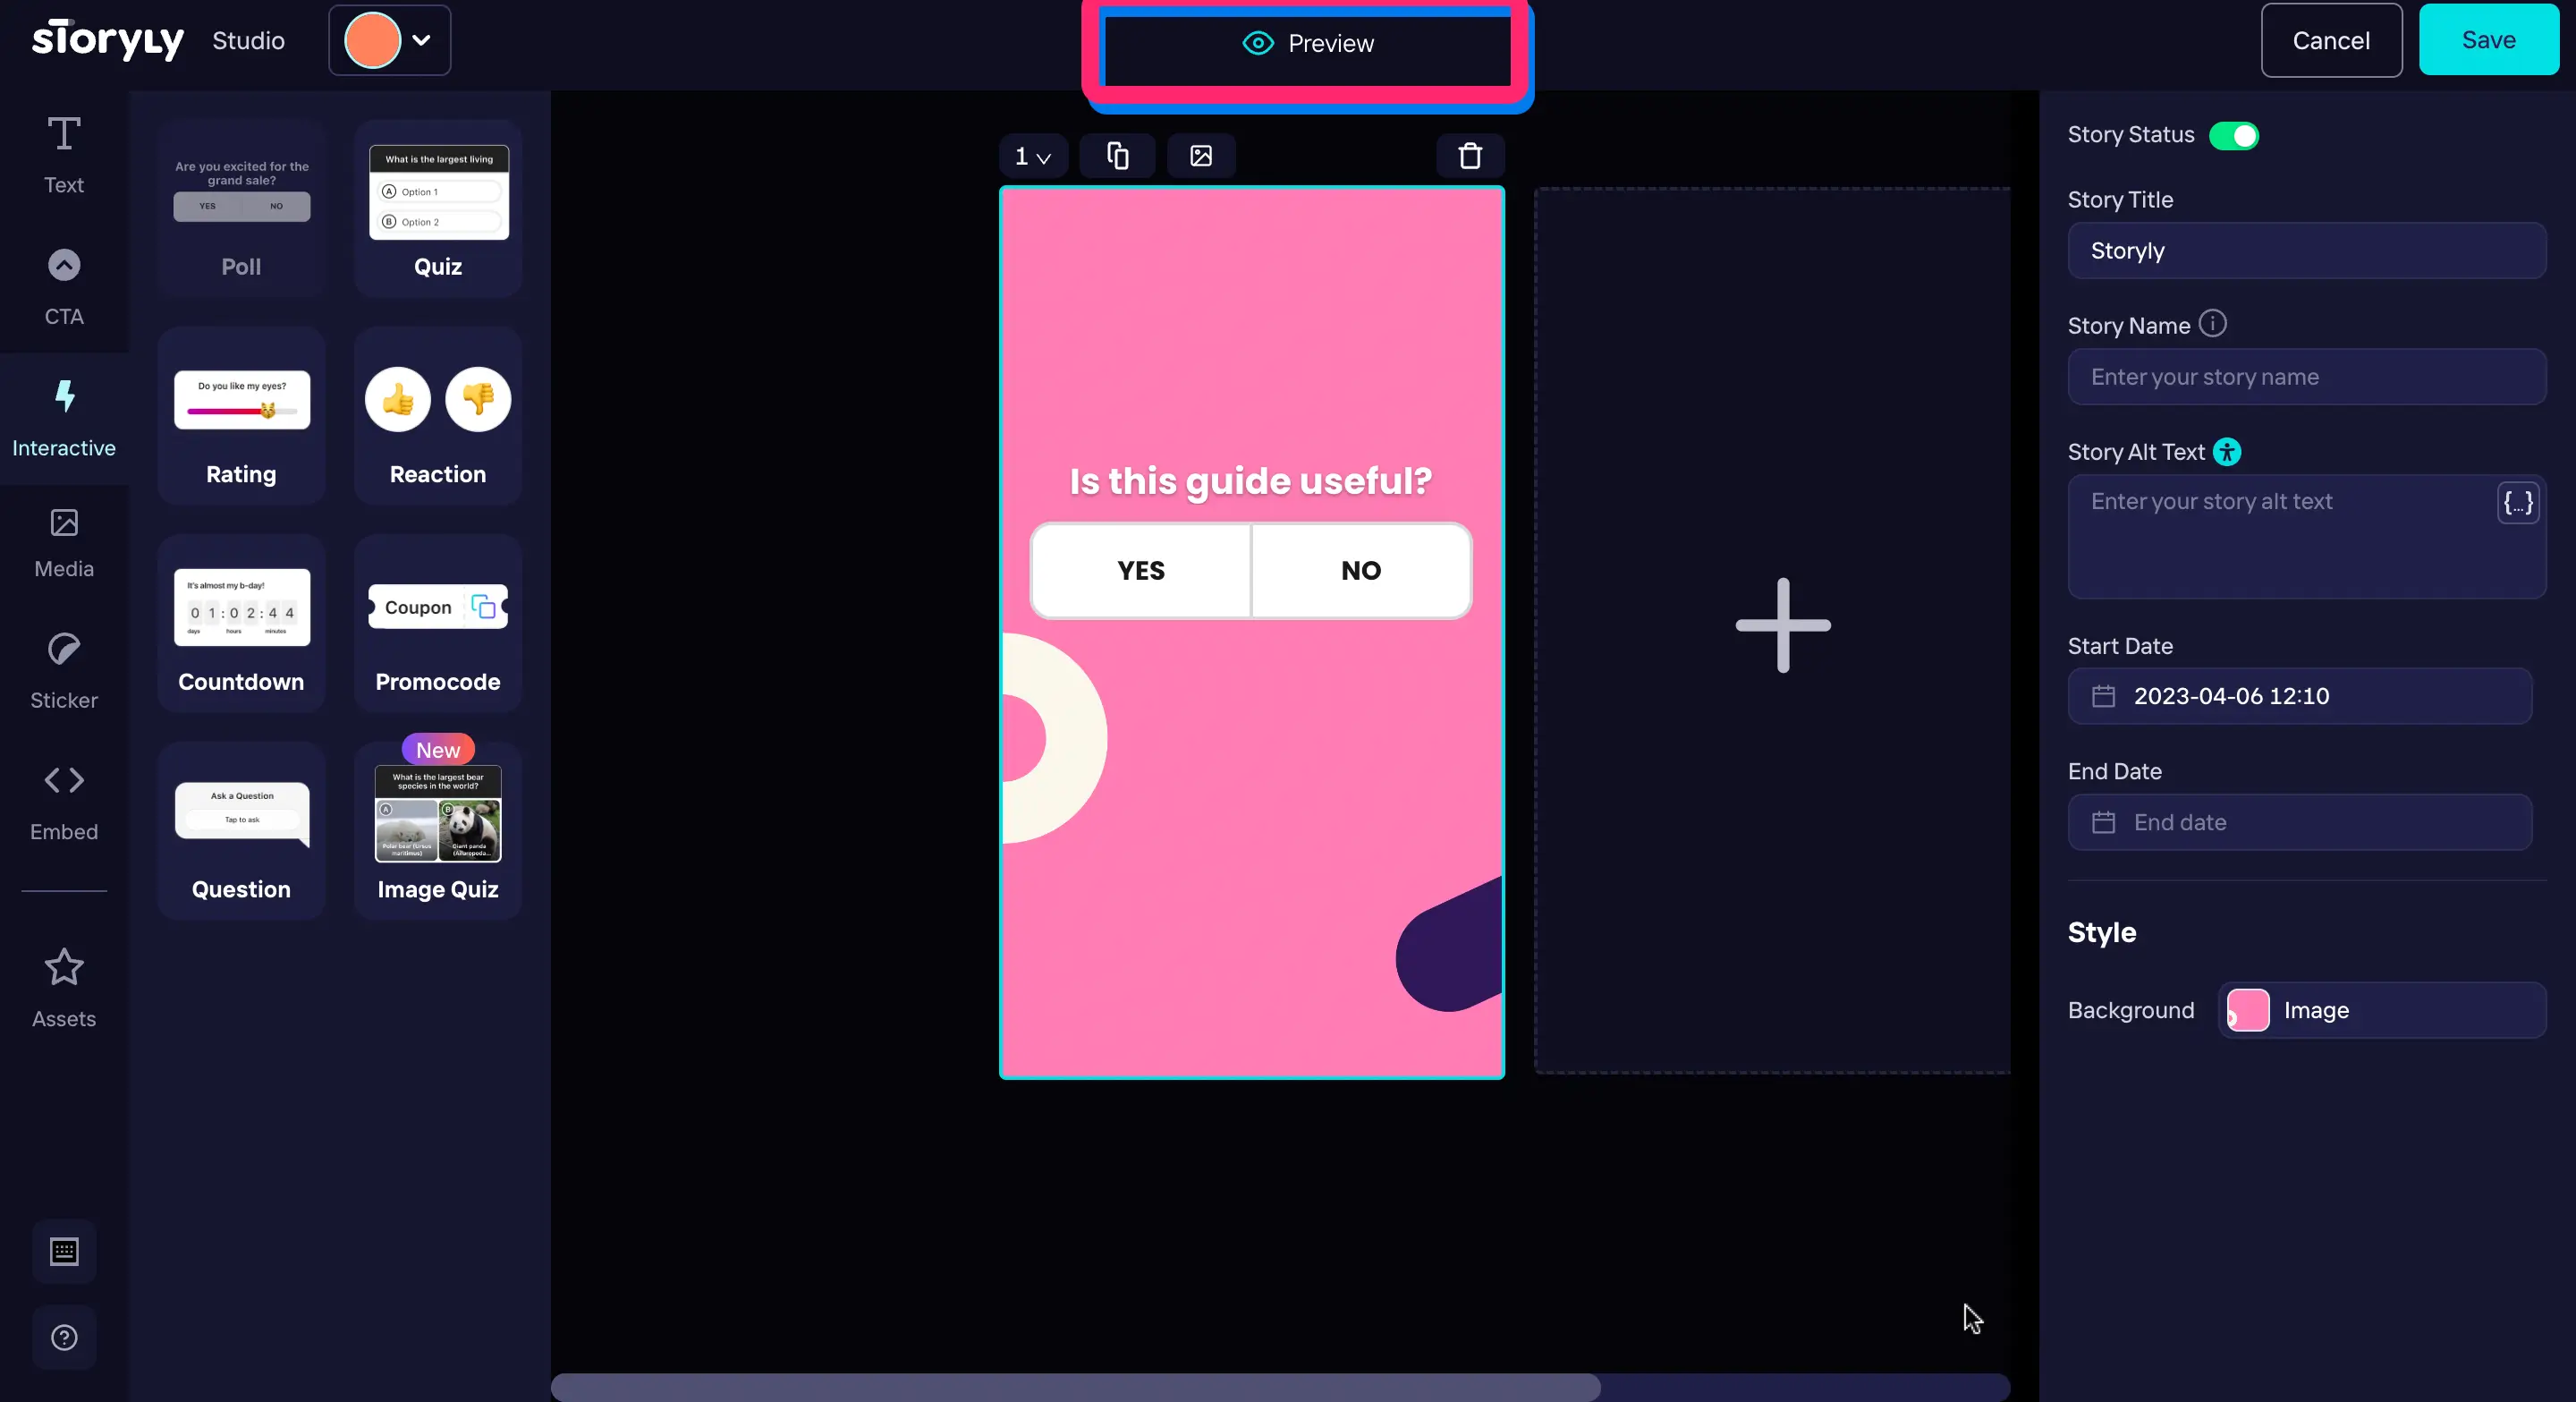
- Web desktop - Selecting this preview option allows you to preview the Story bar and the content right in your browser.
- Mobile web - With mobile web, this option allows you to generate a QR right in the dashboard and you can use the camera from your mobile device to scan the Qr code and open the Story bar in your mobile browser to test the Stories.
- Internal Test Environment - Apart from the above two options, you are also welcome to use your own internal test environment. This means you will have to use the token that i mentioned earlier and integrate it into your own test environment in order to test out the stories, please refer to the integration guide above for more details.
After testing and making any changes you need, you are now ready to publish your Stories. As mentioned earlier in step 4, you would have saved your Stories as a test so now from the content section you can select all of your Story groups and use the bulk options to set your Story groups live. As you are already integrated, you should see the groups appear on your website.
Congratulations! You have now enabled Web Stories on your website and your users will enjoy an immersive Web Story experience.


